目录
产品经理又有新需求啦,其中有一个图片上传后用户拉伸图像宽高的功能,评估后因要卡上线时间来不及砍掉了。保不准下一个版本又会提这个功能,所以还是要去研究研究。
幸亏我有关注张鑫旭大佬的博客,印象中记得发表过一篇关于图像拉伸的文章,就是它JS之我用单img元素实现了图像resize拉伸效果。刚好满足产品想要的效果,demo都是现成的。

文章对js逻辑部分并没有描述,像我这种爱学习,那不得知其所以然。
因此,我读了读源码200行左右,并且去掉边界判断逻辑,只将核心逻辑写了一遍。
先把效果秀出来:

先搞定图像拉伸样式
先写一个img元素,给它的src属性添加一个在线的图像链接。
HTML<img class="image-size" src="https://pic1.zhimg.com/v2-d58ce10bf4e01f5086c604a9cfed29f3_r.jpg?source=1940ef5c" alt="拉伸">
再给它整点样式重点是 border-image属性,大佬文章也是介绍使用border-image属性做到单img实现拉伸。不赘述,跟我一样爱学习的人肯定会去瞅一眼大佬文章的。
CSS/* 先默认宽度400px */
.image-size {
  width: 400px;
}

img.active {
  cursor: default;
  z-index: 1;
  display: inline-block;
  vertical-align: bottom;
  font-size: 12px;
  border: 3px solid transparent;
  border-image: url("data:image/svg+xml,%3Csvg width='30' height='30' viewBox='0 0 30 30' fill='none' xmlns='http://www.w3.org/2000/svg'%3E%3Cpath stroke='%23914AFF' d='M2.5 2.5h25v25h-25z'/%3E%3Cpath d='M0 0v12h2V2h10V0H0zM0 30V18h2v10h10v2H0zM30 0H18v2h10v10h2V0zM30 30H18v-2h10V18h2v12z' fill='%23914AFF'/%3E%3C/svg%3E") 12 / 12px / 0;
  margin: -1px;
  position: relative;
  -webkit-user-select: none;
  user-select: none;
}
点击图片后,给它添加一个active类名。若点击的不是该图像,则清除图像的active类名。
JavaScriptconst image = document.getElementsByClassName('image-size')[0]
image.onclick = (e) => {
  if (image.classList.contains('active')) return
  image.classList.add('active')
}

document.onclick = (e) => {
   if (e.target === image) return
   image.classList.remove('active')
}
如下GIF录屏所示:
也可以点击这里体验:拉伸样式demo
再搞定鼠标光标样式
鼠标光标默认箭头,现在需要当鼠标移动到图像左上、左下、右上、右下四个角时,鼠标光标样式随之进行改变。
注意看GIF演示中的鼠标变化:

上图是大佬的demo。
鼠标移动至左上角、右下角处,鼠标光标样式修改成:

鼠标移动至左下角、右上角,鼠标光标样式修改成:

修改鼠标光标使用属性cursor,对该属性不清楚的童鞋们移步cursor官方文档。
给图像添加active类名后,再给document绑定一个鼠标移动事件onmousemove。当鼠标移动过程中计算鼠标位置是否已进行某个区域内。
该区域可以为下图红框框起来的区域,图像左上、左下、右上、右下四个角均会有一个这样的区域。
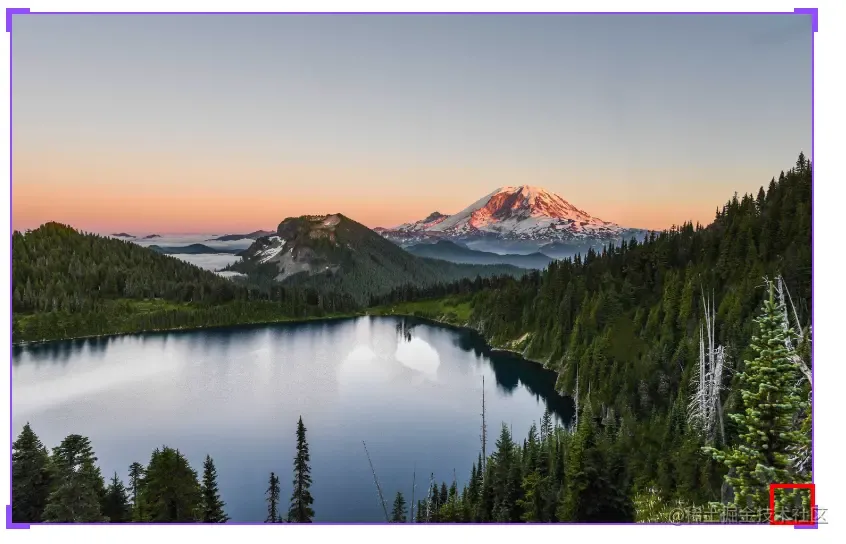 计算过程要获取到图像的
left、top、right、bottom值,也就是使用Element.getBoundingClientRect(),不清楚该API的童鞋移步getBoundingClinetRect官方文档
JavaScript //省略...

image.onclick = (e) => {
  if (image.classList.contains('active')) return
  image.classList.add('active')

  document.onmousemove = (e) => {
      const target = e.target
      if (target !== image || !target.classList.contains('active')) return
      const x = e.clientX,
          y = e.clientY
      const { top, left, bottom, right } = image.getBoundingClientRect()
      //左上角或右下角
      if ((bottom - y < 20 && right - x < 20) || (x - left < 20 && y - top < 20)) {
          image.style.cursor = 'nwse-resize'

          //左下角或右上角
      } else if ((y - top < 20 && right - x < 20) || (bottom - y < 20 && x - left < 20)) {
          image.style.cursor = 'nesw-resize'

          //若都不是,鼠标光标为默认箭头样式
      } else {
          image.style.cursor = 'default'
      }
  }
}

//省略...
伪代码中20这个数字是我随意写的,这个值为红框框起来区域的宽高。
若取消图像的拉伸状态,则也把document已绑定的鼠标移动事件取消。
JavaScript//省略...

document.onclick = (e) => {
  if (e.target === image) return
  image.classList.remove('active')
  document.onmousemove = null
}
可以点击这里体验:图像拉伸鼠标样式改变demo。
让图像宽高动起来
先给image元素添加onmousedown事件,并获取鼠标左键按下时clientX、clientY的值作为开始拉伸的位置,默认为0
拉伸逻辑计算发生在document.onmousemove事件内,因此,需要有一个变量isResizeing表示image.onmousedown事件是否被触发。触发,鼠标移动即图像宽高也要进行改变;未触发,鼠标移动仅改变鼠标光标的样式,不影响图像的宽高。
isResizeing不能一直为true,鼠标抬起onmouseup重置为false。
JavaScript //省略...

image.onclick = (e) => {
  if (image.classList.contains('active')) return
  image.classList.add('active')
  let startX = 0,
      startY = 0,
      //是否拉伸状态
      isResizeing = false,
      position = ''
  image.onmousedown = (e) => {
      //鼠标左键落下的X、Y位置
      startX = e.clientX
      startY = e.clientY
      isResizeing = true
  }

  document.onmousemove = (e) => {
     e.preventDefault()
     const target = e.target
     let x = e.clientX,
          y = e.clientY,
          distanceX = x - startX,
          distanceY = y - startY
     if(isResizeing){
       //图像已处于拉伸的状态


     }else{
       //改变鼠标光标样式

       if(if (target !== image || !target.classList.contains('active')) return){
         const { top, left, bottom, right } = image.getBoundingClientRect()
          //左上角或右下角
         if ((bottom - y < 20 && right - x < 20) || (x - left < 20 && y - top < 20)) {
            image.style.cursor = 'nwse-resize'

            //左下角或右上角
         } else if ((y - top < 20 && right - x < 20) || (bottom - y < 20 && x - left < 20)) {
            image.style.cursor = 'nesw-resize'

            //若都不是,鼠标光标为默认箭头样式
         } else {
            image.style.cursor = 'default'
         }
       }
    }

  document.onmouseup = () => {
    //鼠标抬起时,重置isResizeing变量
    isResizeing = false
  }
}

//省略...
还需要有一个变量 position,用于判断拉伸的是左上、右下、左下、右上四个角中的哪一个 。
JavaScript    //省略
    if ((bottom - y < 20 && right - x < 20) || (x - left < 20 && y - top < 20)) {
          //左上角或右下角

          image.style.cursor = 'nwse-resize'
          // 右下角
          if (bottom - y < 20) {
              position = 'bottom right'
              return
          }
          position = 'top left'

     } else if ((y - top < 20 && right - x < 20) || (bottom - y < 20 && x - left < 20)) {
       //左下角或右上角

        image.style.cursor = 'nesw-resize'
        // 右上角
        if (y - top < 20) {
            position = 'top right'
            return
        }

        position = 'bottom left'

        //若都不是,鼠标光标为默认箭头样式
     } else {
        image.style.cursor = 'default'
         position = ''
     }
   //省略 ...
有了position变量,即可在if(isResizeing){...}这个代码块中依据position值进行拉伸计算。
JavaScript //省略...

image.onclick = (e) => {
  if (image.classList.contains('active')) return
  image.classList.add('active')
  let startX = 0,
      startY = 0,
      //是否拉伸状态
      isResizeing = false,
      position = '',
      storeWidth = 0,
      storeHeight = 0
  image.onmousedown = (e) => {
      //鼠标左键落下的X、Y位置
      startX = e.clientX
      startY = e.clientY
      isResizeing = true
      storeWidth = image.clientWidth
      storeHeight = image.clientHeight
  }

  document.onmousemove = (e) => {
     e.preventDefault()
     const target = e.target
     let x = e.clientX,
        y = e.clientY,
        distanceX = x - startX,
        distanceY = y - startY,
        width = 0,
        height = 0
     if(isResizeing){
       //图像已处于拉伸的状态
          if (!position) return
          if (position === 'bottom right') {
              /*
                  右下角
                  distanceX值为正,distanceY值为正,图像宽高变大;
                  distanceX值为负,distanceY值为负,图像宽高变小
              */
              width = storeWidth + distanceX
              height = storeHeight + distanceY
          } else if (position === 'top left') {
              /*
                  左上角正好与右下角相反
                  distanceX值为正,distanceY值为正,图像宽高变大;
                  distanceX值为负,distanceY值为负,图像宽高变小
              */
              width = storeWidth - distanceX
              height = storeHeight - distanceY
          } else if (position === 'top right') {
              /*
                  右上角
                  distanceX值为正,distanceY值为负,图像宽高变大;
                  distanceX值为负,distanceY值为正,图像宽高变小
              */
              width = storeWidth + distanceX
              height = storeHeight - distanceY
          } else if (position === 'bottom left') {
              /*
                  左下角
                  distanceX值为负,distanceY值为正,图像宽高变大;
                  distanceX值为正,distanceY值为负,图像宽高变小
              */
              width = storeWidth - distanceX
              height = storeHeight + distanceY
          }
         image.style.width = Math.round(width) + 'px'
         image.style.height = Math.round(height) + 'px'
     }else{
       //省略
    }

  document.onmouseup = () => {
    //鼠标抬起时,重置isResizeing变量
    isResizeing = false
  }
}

//省略...
该部分代码可以优化,但这样写容易理解,如何优化可以看下张鑫旭/单IMG元素的图像拉伸效果 。
完成这步,图像已经可以位伸宽高了。
如下GIF录屏所示:
可以点击这里体验:图像拉伸宽高改变。
图像是有比例的,如常见比例16:9,3:4等。现在实现出来的拉伸没有按比例进行拉伸,还需要优化。
先计算出图像比例,比例=图像宽度/ 图像高度。比较distanceX、distanceY两者值谁的移动距离更大。若distanceX值更大,则以图像宽度计算出它的高度;若distanceY值更大,则以图像的高度计算出它的宽度。
JavaScript //省略...

image.onclick = (e) => {
    //省略
  document.onmousemove = (e) => {
     e.preventDefault()
     const target = e.target
     let x = e.clientX,
        y = e.clientY,
        distanceX = x - startX,
        distanceY = y - startY,
        width = 0,
        height = 0
     if(isResizeing){
       //图像已处于拉伸的状态
          if (!position) return
          //省略

          let imageWidth = 0,
              imageHeight = 0
          const ratio = storeWidth / storeHeight
          // 选择移动距离大的方向
          if (Math.abs(distanceX) > Math.abs(distanceY)) {
              // 宽度变化为主
              imageWidth = width;
              imageHeight = width / ratio;
          } else {
              // 高度变化为主
              imageHeight = height;
              imageWidth = height * ratio;
          }
         image.style.width = Math.round(imageWidth) + 'px'
         image.style.height = Math.round(imageWidth) + 'px'
     }else{
       //省略
    }
   //省略
}

//省略...
OK,到此完毕。
如下GIF录屏所示:

可以点击这里体验:图像拉伸。
总结
从读张鑫旭的文章demo源码出发,自己也对图像拉伸的功能实现了一遍,做到脑会手也会。以后再有类似的功能分分钟搞定它!
关注张鑫旭大佬,好处多多。

如果我的文章对你有帮助,你的👍就是对我的最大支持^_^。
本文作者:凌览
本文链接:
版权声明:本博客所有文章除特别声明外,均采用 BY-NC-SA 许可协议。转载请注明出处!